Delivering Sonday System Essentials Online
It is optimal to use a videoconferencing platform, such as Zoom or Google Hangouts for Classroom, that facilitates live exchange between you and your students. When teaching via videoconference, you'll follow the regular Sonday System Essentials lesson format for each session. Students should still do written work with paper and pencil to incorporate sight, hearing, touch, and movement, which will help them learn the concepts being taught. Collecting your student's written work is useful to document their learning and inform prescriptive teaching. It can be submitted by emailing a photo of the page, uploading to a platform, regularly bringing to a drop-off point for collection, or sending by mail. Share the customizable memo found under the Resources tab with your student's families. It describes the online lessons and the adult help needed for participation. For students who do not have online access, provide word lists and worksheets for daily reading, spelling, and writing practice. Links to print the word lists and worksheets can be found within each lesson or under the Printables tab.
Before you begin, understand that tracing and Touch Spelling are key multisensory teaching strategies in the Sonday System. They are used for instruction and error correction, so it's important that you are comfortable with them. If the Sonday System is new to you, or if you simply want to review these techniques, watch error correction in action here and read the how-to summaries at the end of this article.
Quick start steps to deliver an online lesson:
What you need:
- A way to communicate online lesson invitations. Consider emailing or texting invitations directly or posting a link on a learning management system such as Blackboard or Google Classrooms. A customizable memo describing the online lessons and the adult help needed for participation can be found under the Resources tab.
- A computer, tablet, or smartphone with a webcam, microphone, and internet access. An Ethernet connection is often more reliable than Wi-Fi).
- A videoconferencing platform application such as Zoom or Google Hangouts. Click the following links for free videoconferencing downloads and user guides:Zoom
Download Center - Zoom
Zoom Help Center
Google
Google Meet
Google Meet training and help - Web access to your Sonday System Essentials kit(s). Follow the link in the email invitation from Winsor Learning to create your username and password. This link will allow you to access all the content needed to deliver Sonday System Essentials lessons online and in the classroom from your browser. The screens that you will share with students during each lesson are found here. Teaching instructions for the steps of each lesson can be accessed using the Lesson Plan link within the lesson. Users with physical Sonday System Essentials kits are invited to access all of the materials needed for online and in classroom teaching via web browser or may use their physical kit to screenshare lessons from the Media Kit flash drive and use the lesson plan instructions in the Learning Plan Book.
Preparing for your session:
- Log in to your account at www.winsorlearning.com and launch your kit from My Teaching Tools.
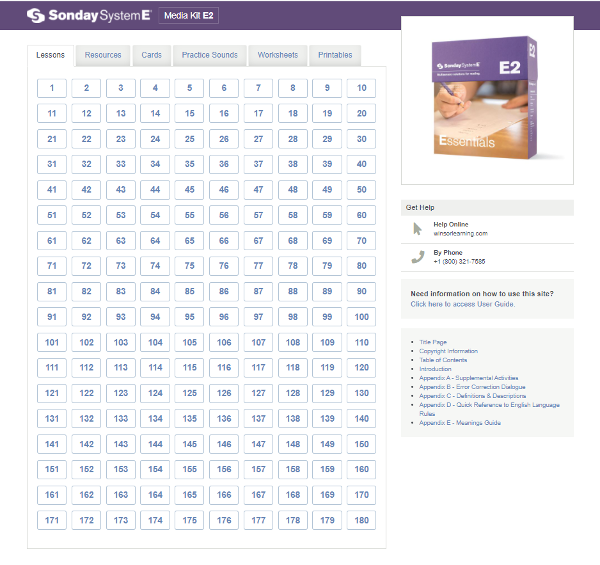
- Select the lesson to be displayed by clicking on the lesson number. Once the lesson opens, you'll want to fit the lesson to your screen. See the Media Kit User Guide under the Resources tab for browser-specific how-to's.
- Teaching instructions for the lesson are under the Lesson Plan link within each lesson. We suggest displaying it on a non-shared screen to reference while teaching.
- Connect with students using your videoconferencing platform to deliver a Sonday System Essentials lesson online.
- Screenshare the day's lesson with your students. Follow the lesson plan's teaching directions for each step. Read the tips below for delivering each step online.
Online Lesson Delivery Tips:
Step 1, READ SOUNDS:
Click through the sound cards by clicking the arrow bar to the right of the slide or clicking anywhere on the slide itself. To move to a previous slide, click the bar to the left of the slide.
Online teaching tips: Hearing individual errors may be challenging. Stop at sounds students typically have difficulty with-such as b/d, y, all vowels, letters with multiple sounds, and tricky blends-and trace these with all students while they say the sound aloud. Model finger tracing on a contrasting surface in front of your webcam. Remind students to look at the letter on the screen while tracing.
Hear the accurate pronunciations of vowel and consonant sounds under the Songs & Sounds tab or in the Practice Sounds files in the Media Kit flash drive.
Step 2, SPELL SOUNDS:
Students will use a single piece of paper for the whole lesson. Have each student write their name, date, and lesson number on it. Remind students and families to submit the paper by emailing a photo of the page, uploading to a platform, regularly dropping off at a collection point, or sending by mail.
Online teaching tips: After giving students time to write, use your platform's functionality to write each sound on the blue screen. Alternatively, use a dark marker to write on paper or a dry erase board held up to your webcam. Options for error correction are a) choosing one or two sounds with which students often make errors and having all students write each sound again while saying it aloud and b) asking students what they wrote and correcting any errors as below. If possible, have students show their written work via their webcams.
Error correction: "Say /__ /. What letter makes the /__ / sound?" Teacher writes the letter. "If you made a mistake, cross it out and write /__ / correctly. Everyone write /__ / again."
Step 3, READ WORDS:
Reading fewer words accurately and automatically is better than reading many words inaccurately and/or with difficulty. Each lesson provides more words and sentences than you are likely to get through in a single session.
Online teaching tips: Ask students to read the words on the screen. Physically tracking the word on the screen as it is read can be very helpful for students. Suggest that students use a new unsharpened pencil, a chopstick, or a similar object. If your student has a printed word list for the lesson, ask them to read word list number 3, for example. Hearing individual errors may be challenging. In that case, stop and ask all students to trace several of the words selected based on your knowledge of students' past errors. Remind students to look at the word on the screen or in print while tracing it. Model tracing on a contrasting surface in front of your webcam.
Step 4, SPELL WORDS:
Online teaching tips: After giving students time to write, use your platform's functionality to write each word on the blue screen. Alternatively, use a dark marker to write on paper or a dry-erase board held up to your webcam. Options for error correction are a) choosing one or two words with which students often make errors and having all students Touch Spell and write each word again or b) asking students what they wrote and basing error correction on student responses. Have students hold their fingers up to the webcam during Touch Spelling. If possible, have students show their written work via their webcams.
For sentences, address errors seen via webcam or select one or two commonly misspelled words to Touch Spell and write again with the group. Use your platform's functionality to write each sentence on the blue screen. Alternatively, use a dark marker to write on paper or a dry-erase board held up to your webcam.
Step 5, NEW MATERIAL:
Online teaching tips: For new sounds, remind students to look at the letter on the screen while tracing and saying its sound. Model finger tracing on a contrasting surface in front of your webcam. After giving students time to write, use your platform's functionality to write the new sound on the blue screen. When reading new words, select two or three words and ask all students to trace them for reinforcement. When spelling new material, choose one or two words for all students to Touch Spell and write again or ask students what they wrote and base error correction on student responses. If possible, have students show their written work via webcam. Ask students to hold their fingers up for the webcams during Touch Spelling.
Independent Practice:
Worksheets for each lesson are available under the Worksheets tab and on the Media Kit flash drive to share with students for independent practice. Encourage students to submit worksheets so that you can identify what sounds and words are problematic. A worksheet can be submitted by emailing a photo of the page, uploading to a platform, regularly dropping off at a collection point, or sending by mail.
Tracing and Touch Spelling: Your Go-To's for Error Correction
Reading Error? Trace!
If a student does not readily recognize a word or sound, have the student trace the letters on the table using 2 fingers of the writing hand while saying each sound aloud.
For reading sounds errors, follow these steps:
- Say: "Let's trace."
- Students look at the letter(s) and trace the letter(s) while saying the sound(s).
- Reinforce the correct sound(s).
- Say: "__ says /__ /. Trace /__ /."
For reading words errors, follow these steps:
- Say: "Let's trace."
- Students look at the word and trace each letter while saying its sound.
- Students blend the sounds while underlining the word with their fingers and saying the whole word.
- Say: "Yes, the word is /__ /. Trace /__ / again."
- Students blend the sounds two more times.
Spelling Error? Touch Spell!
Touch Spelling is a strategy for separating the sounds in a word, identifying them, and putting them in the correct sequence. To use Touch Spelling, have the student hold up the non-writing hand and assign one sound to each finger to separate the sounds that make up the word. For example, when writing the word "sat," the right-handed writer would hold up the left hand, palm toward the face, extend the thumb and say /s/, extend the forefinger and say /a/, and extend the middle finger and say /t/. The writer would then write the sounds assigned to each finger, in order, from left to right, to form the word "sat," saying each sound aloud while writing it. Words may have more letters than sounds. For example, to Touch Spell the word "day," the right-handed writer would extend the thumb and say /d/, then extend the forefinger and say the long sound of /ay/.
For spelling error correction, follow these steps:
- Say: "Say /____ /." "Touch Spell _______. "
- Stop at the errored sound. "What sounds(s) do you hear?"
- "What letter(s) make that sound?"
- "If you made a mistake, cross it out and write _______ correctly."
- "Everyone write it again."